12 KiB
| layout | title | permalink |
|---|---|---|
| page | Documentation | /doc/ |
Main Interface
Here is the interface for FaceSwap Lab. It is available in the form of an accordion in both img2img and txt2img.
You can configure several units, each allowing you to replace a face. Here, 3 units are available: Face 1, Face 2, and Face 3. After the face replacement, the post-processing part is called.
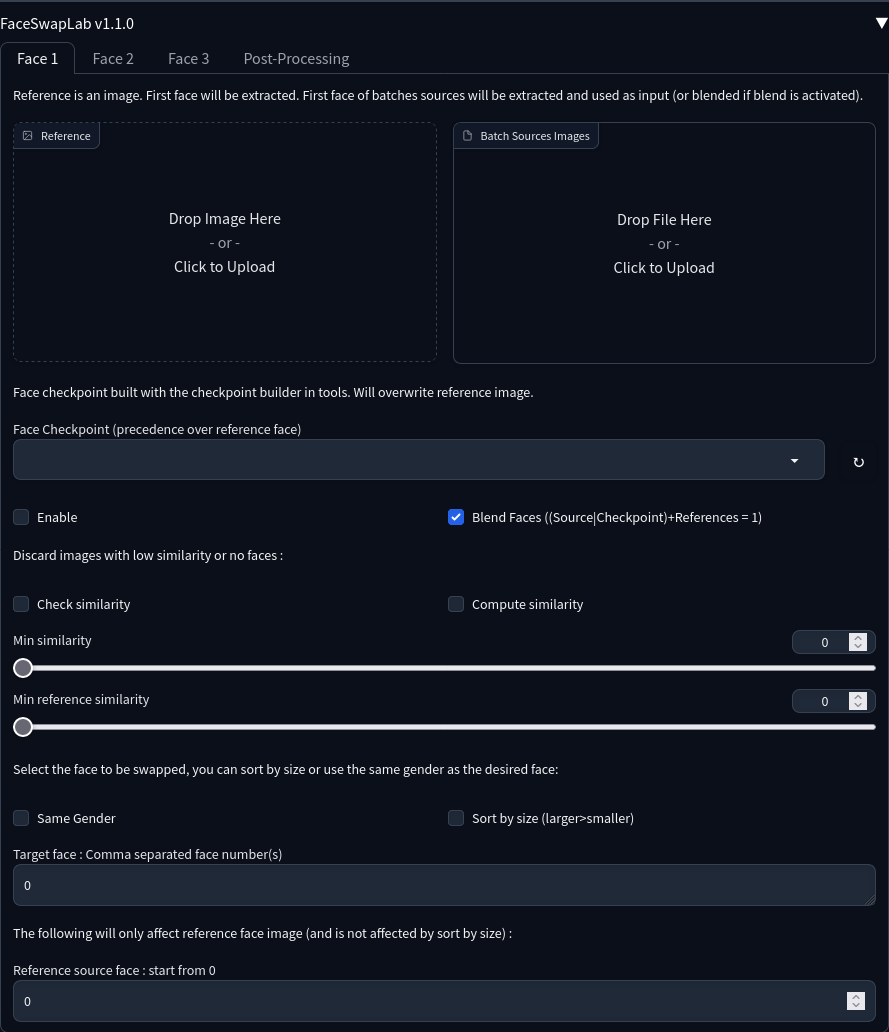
Face Unit
The first thing to do is to activate the unit with 'enable' if you want to use it.
Here are the main options for configuring a unit:
- Reference: This is the reference face. The face from the image will be extracted and used for face replacement. You can select which face is used with the "Reference source face" option at the bottom of the unit.
- Batch Source Image: The images dropped here will be used in addition to the reference or checkpoint. If "Blend Faces" is checked, the faces will be merged into a single face by averaging the characteristics. If not, a new image will be created for each face.
- Face Checkpoint: Allows you to reuse a face in the form of a checkpoint. Checkpoints are built with the build tool.
- Blend Faces : Insighface works by creating an embedding for each face. An embedding is essentially a condensed representation of the facial characteristics. The face blending process allows for the averaging of multiple face embeddings to generate a blended or composite face. If face blending is enabled, the batch sources faces and the reference image will be merged into a single face. This is enabled by default.
You must always have at least one reference face OR a checkpoint. If both are selected, the checkpoint will be used and the reference ignored.
Always check for errors in the SD console. In particular, the absence of a reference face or a checkpoint can trigger errors.
-
Comparison of faces with the obtained swapped face: The swapped face can be compared to the original face using a distance function. The higher this value (from 1 to 0), the more similar the faces are. This calculation is performed if you activate "Compute Similarity" or "Check Similarity". If you check the latter, you will have the opportunity to filter the output images with:
- Min similarity: compares the obtained face to the calculated (blended) face. If this value is not exceeded, then the face is not kept.
- Min reference similarity: compares the face to the reference face only. If this value is not exceeded, then the face is not kept.
-
Selection of the face to be replaced in the image: You can choose the face(s) to be replaced in the image by indicating their index. Faces are numbered from top-left to bottom-right starting from 0. If you check
- Same gender: the gender of the source face will be determined and only faces of the same gender will be considered.
- Sort by size: faces will be sorted from largest to smallest.
Post-processing
The post-processing window looks very much like what you might find in the extra options, except for the inpainting part. The process takes place after all units have swapped faces.
The entire image and all faces will be affected by the post-processing (unlike what you might find in the upscaled inswapper options). If you're already applying a face restorer in the upscaled inswapper, the face_restorer of the post-processing will also be applied. This is probably not what you want, and in this case it might be better to leave it as None.
In the current version, upscaling always occurs before face restoration.
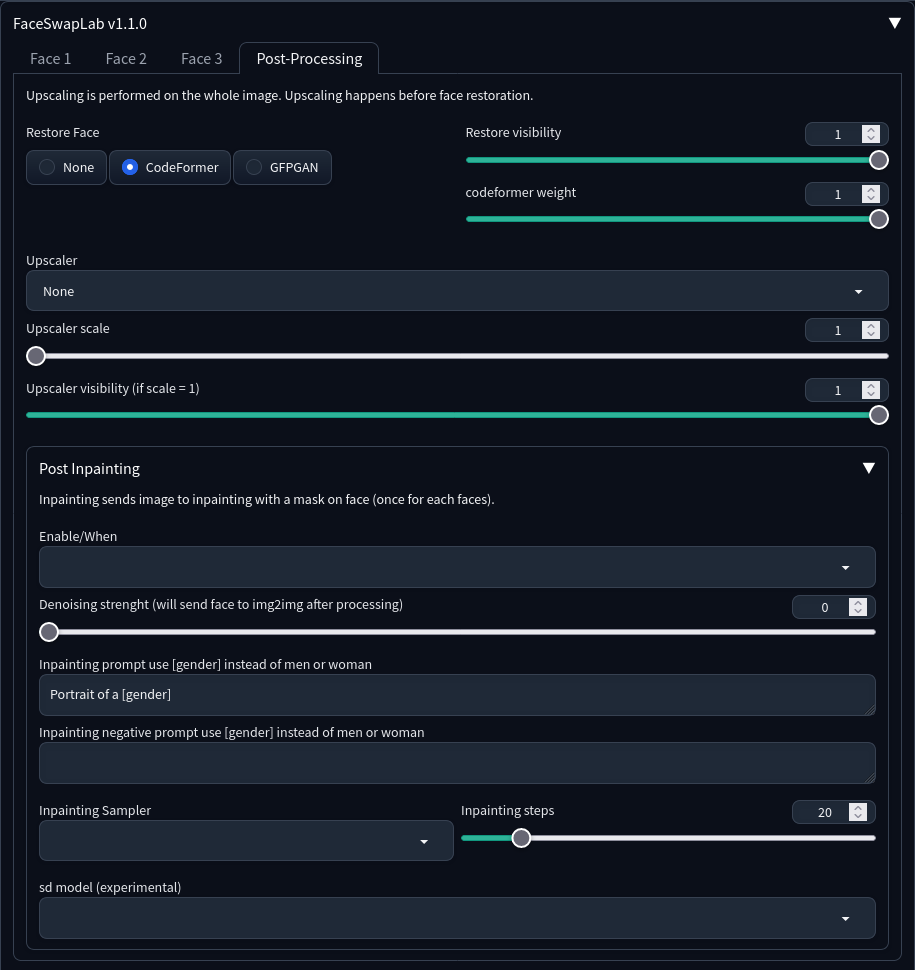
The inpainting part works in the same way as adetailer. It sends each face to img2img for transformation. This is useful for adding details to faces. The stronger the denoising, the more likely you are to lose the resemblance of the face. Some samplers seem to better preserve this resemblance than others. You can use a specific model for the replacement, different from the model used for the generation.
For inpainting to be active, denoising must be greater than 0 and the Inpainting When option must be set to:
- Never means that no inpainting will be done.
- Before upscaling means that inpainting will occur before upscaling.
- Before restore face means the operation will occur between upscaling and face restoration.
- After all means that inpainting will be done last.
For now, inpainting applies to all faces, including those that have not been modified.
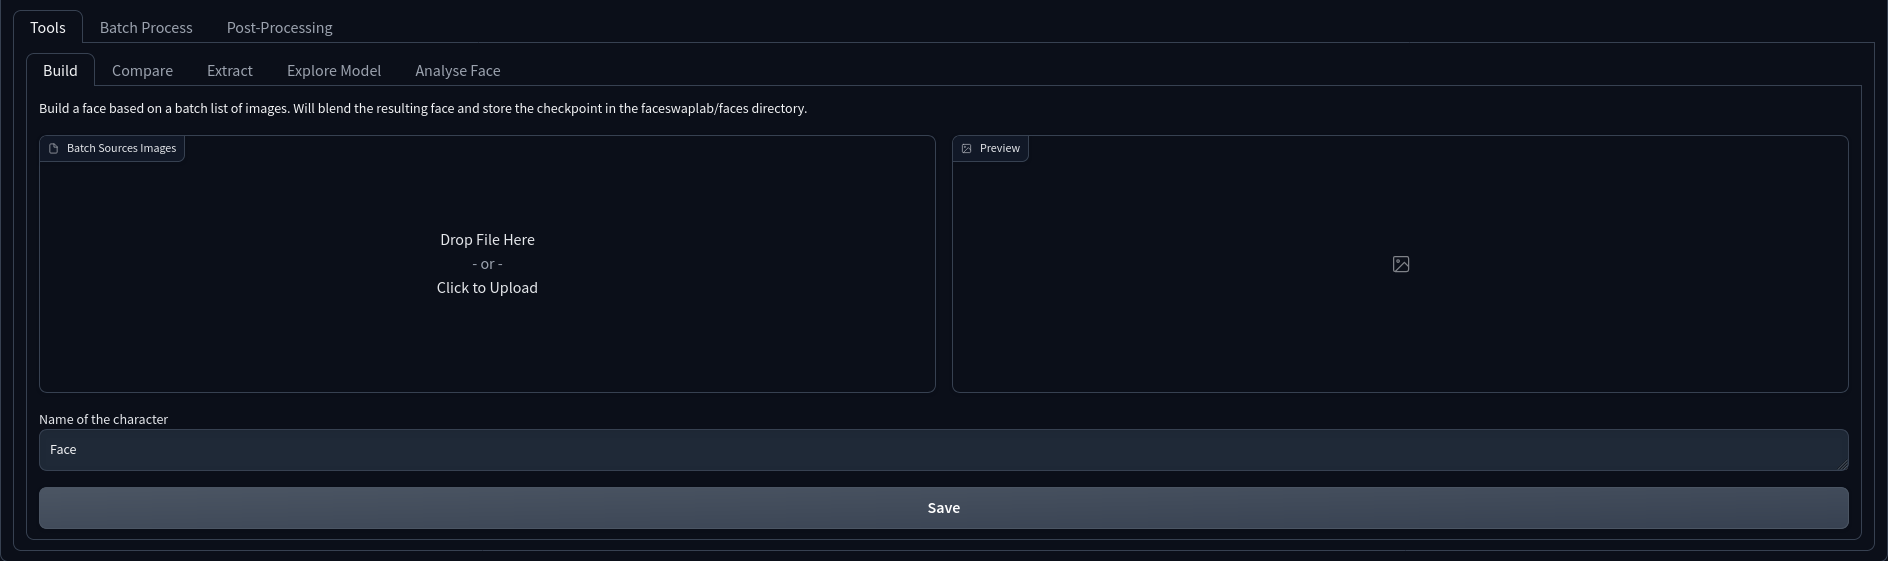
Tab
The tab provides access to various tools:
-
the use of a batch process with post-processing. The tool works like the main interface, except that stable diffusion is not called. Drop your images, choose a source directory (mandatory), configure the faces and click on Process&Save to get the replaced images.
-
the tool part allows you to:
- build one of the face checkpoints
- compare two faces, works the same way as the compute similarity
- extract faces from images
- explore the model (not very useful at the moment)
- analyze a face : This will give the output of the insightface analysis model on the first face found.
-
Build Checkpoints: The FaceTools tab now allows creating checkpoints, which facilitate face reuse. When a checkpoint is used, it takes precedence over the reference image, and the reference source image is discarded.
The faces from different images will be merged and stored under the given face name (no special characters or spaces). All checkpoints are stored in models/faceswaplab/faces.
Once finished, the process gives a preview of the face using the images contained in the references directory (man or woman depending on the detected gender).

The checkpoint can then be used in the main interface (use refresh button)

Upscaled-inswapper
The 'Upscaled Inswapper' is an option in SD FaceSwapLab which allows for upscaling of each face using an upscaller prior to its integration into the image. This is achieved by modifying a small segment of the InsightFace code.
The purpose of this feature is to enhance the quality of the face in the final image. While this process might slightly increase the processing time, it can deliver improved results. In certain cases, this could even eliminate the need for additional tools such as Codeformer or GFPGAN in postprocessing. See the processing order section to understand when and how it is used.
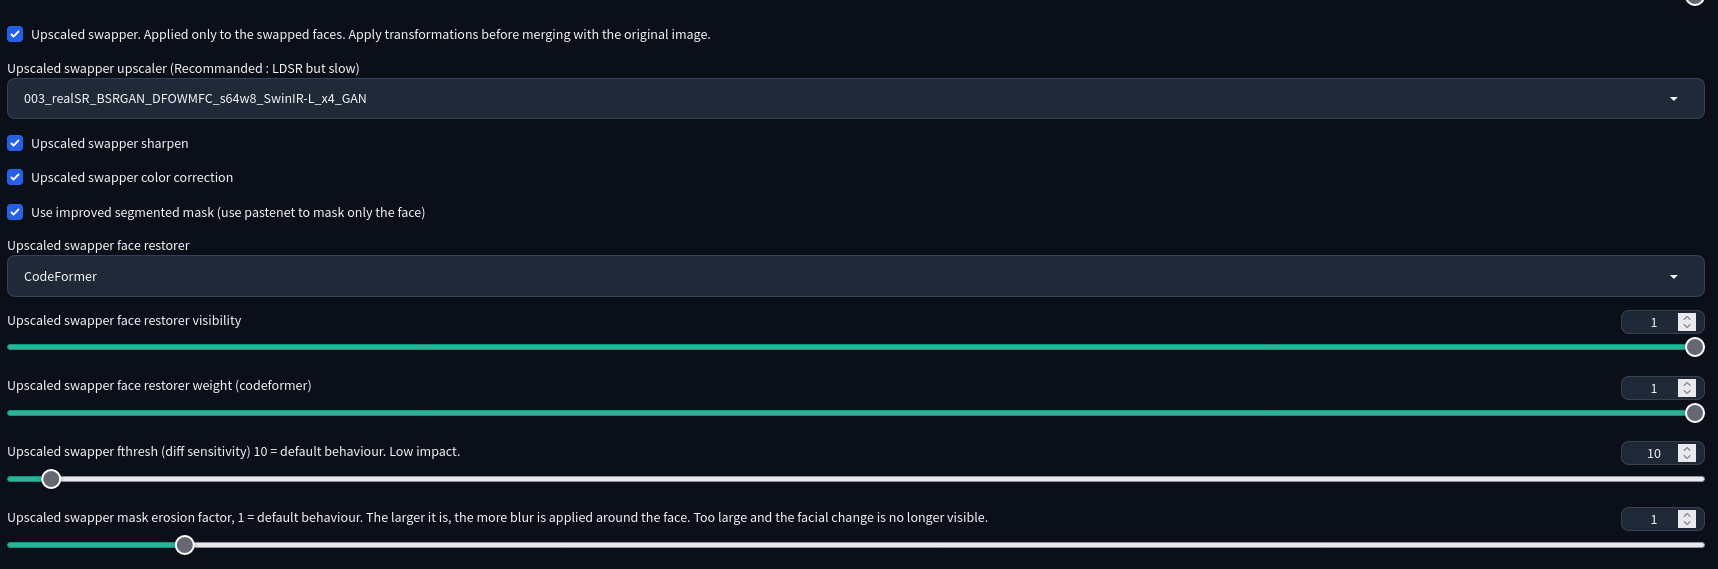
The upscaled inswapper is disabled by default. It can be enabled in the sd options. Understanding the various steps helps explain why results may be unsatisfactory and how to address this issue.
- upscaler : LDSR if None. The LDSR option generally gives the best results but at the expense of a lot of computational time. You should test other models to form an opinion. The 003_realSR_BSRGAN_DFOWMFC_s64w8_SwinIR-L_x4_GAN model seems to give good results in a reasonable amount of time. It's not possible to disable upscaling, but it is possible to choose LANCZOS for speed if Codeformer is enabled in the upscaled inswapper. The result is generally satisfactory.
- restorer : The face restorer to be used if necessary. Codeformer generally gives good results.
- sharpening can provide more natural results, but it may also add artifacts. The same goes for color correction. By default, these options are set to False.
- improved mask: The segmentation mask for the upscaled swapper is designed to avoid the square mask and prevent degradation of the non-face parts of the image. It is based on the Codeformer implementation. If "Use improved segmented mask (use pastenet to mask only the face)" and "upscaled inswapper" are checked in the settings, the mask will only cover the face, and will not be squared. However, depending on the image, this might introduce different types of problems such as artifacts on the border of the face.
- fthresh and erosion factor: it is possible to adjust the mask erosion parameters using the fthresh and erosion settings. The higher these settings are (particularly erosion), the more the mask is reduced.
Processing order:
The extension is activated after all other extensions have been processed. During the execution, several steps take place.
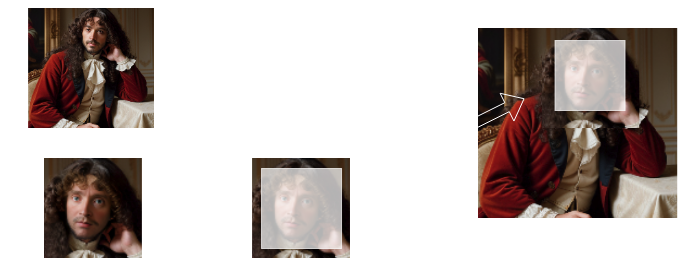
Step 1 : The first step is the construction of a swapped face. For this, the faces are extracted and their resolution is reduced to a square resolution of 128px. This is the native resolution of the model and this explains why the quality suffers. The generated face is also of the same resolution.
Step 2 (Optionnal) : Secondly, and only if upscaled inswapper is enabled, the low-resolution face is corrected by applying the selected transformations:
Step 3a (Default) : The face is replaced in the original image. By default, InsightFace uses a square mask which it erodes to blend into the original image. This explains why clothing or other things may be affected by the replacement. When "upscaled inswapper" is used, it is possible to adjust the mask erosion parameters using the fthresh and erosion settings. The higher these settings are (particularly erosion), the more the mask is reduced.
Step 3b (improved mask) : If the "improved mask" option is enabled and the "upscaled inswapper" is used, then a segmented mask will be calculated on both faces. Therefore, this mask will be more limited in the affected area.
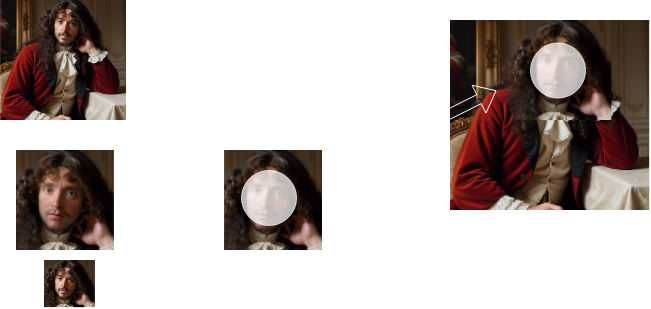
Step 4 (Post-processing and inpainting options) : Finally postprocessing and impainting are perfomed on the image.

Settings
Here are the parameters that can be configured in sd settings and their default values
General Settings :
| Name | Description | Default Value |
|---|---|---|
| faceswaplab_model | Insightface model to use | models[0] if len(models) > 0 else "None" |
| faceswaplab_keep_original | keep original image before swapping. It true, will show original image | False |
| faceswaplab_units_count | How many faces units to use(requires restart) | 3 |
| faceswaplab_detection_threshold | Detection threshold to use to detect face, if low will detect non human face as face | 0.5 |
Default Settings :
These parameters are used to configure the default settings displayed in post-processing.
Name | Description | Default Value faceswaplab_pp_default_face_restorer | UI Default post processing face restorer (requires restart) | None faceswaplab_pp_default_face_restorer_visibility | UI Default post processing face restorer visibility (requires restart) | 1 faceswaplab_pp_default_face_restorer_weight | UI Default post processing face restorer weight (requires restart) | 1 faceswaplab_pp_default_upscaler | UI Default post processing upscaler (requires restart) | None faceswaplab_pp_default_upscaler_visibility | UI Default post processing upscaler visibility(requires restart) | 1
Upscaled inswapper Settings :
These parameters are used to control the upscaled inswapper, see above.
Name | Description | Default Value faceswaplab_upscaled_swapper | Upscaled swapper. Applied only to the swapped faces. Apply transformations before merging with the original image | False faceswaplab_upscaled_swapper_upscaler | Upscaled swapper upscaler (Recommended : LDSR but slow) | None faceswaplab_upscaled_swapper_sharpen | Upscaled swapper sharpen | False faceswaplab_upscaled_swapper_fixcolor | Upscaled swapper color correction | False faceswaplab_upscaled_improved_mask | Use improved segmented mask (use pastenet to mask only the face) | True faceswaplab_upscaled_swapper_face_restorer | Upscaled swapper face restorer | None faceswaplab_upscaled_swapper_face_restorer_visibility | Upscaled swapper face restorer visibility | 1 faceswaplab_upscaled_swapper_face_restorer_weight | Upscaled swapper face restorer weight (codeformer) | 1 faceswaplab_upscaled_swapper_fthresh | Upscaled swapper fthresh (diff sensitivity) 10 = default behaviour. Low impact | 10 faceswaplab_upscaled_swapper_erosion | Upscaled swapper mask erosion factor, 1 = default behaviour. The larger it is, the more blur is applied around the face. Too large and the facial change is no longer visible | 1